February 8, 2015

Making a wooden handled shepherd's stick.

 
 Making a wooden handled shepherd's stick.

 By Clive Dalton

When I started as a ‘shepherd laddie’ on Anglo/Scottish Border farms in the 1950s, (thankfully on the English side), the first thing I needed was a decent stick to ‘look’ sheep on the heather and ‘bent’ (tussock) fells.  The stick was used like the NZ musterer’s stick, but with a crook for the handle.

You couldn’t buy a stick, and unless a shepherd took pity on you and made you one, you had to make your own.  This wasn’t easy, as the experts who won competitions at local shows for their horn and wood-headed crooks, were loathe to divulge their secrets. 

Border Shepherd's Stick Dressing Association 
But things have changed, and viewing the ‘Border Shepherd’s Stick Dressing Association’ website 
< http://www.bsda.eu>, shows how, with Prince Charles as the Association’s senior patron.   ‘Stick dressing’ is now a popular art and craft, involving a wide range of enthusiasts who may only see a sheep on their country rambles.

New Zealand stick dressers
For enthusiastic Kiwi stick makers, there’s a competition at the Waimate North show with five classes, and special encouragement for local school students to take part.  Jacki Hastings from Dargaville (09) 439-8141 is the person to contact for more information.  This initiative needs every encouragement and support by entering a stick.

Rams horns are hard to find in New Zealand as the Drysdale has disappeared, and the Wiltshire Horn is also a rare 
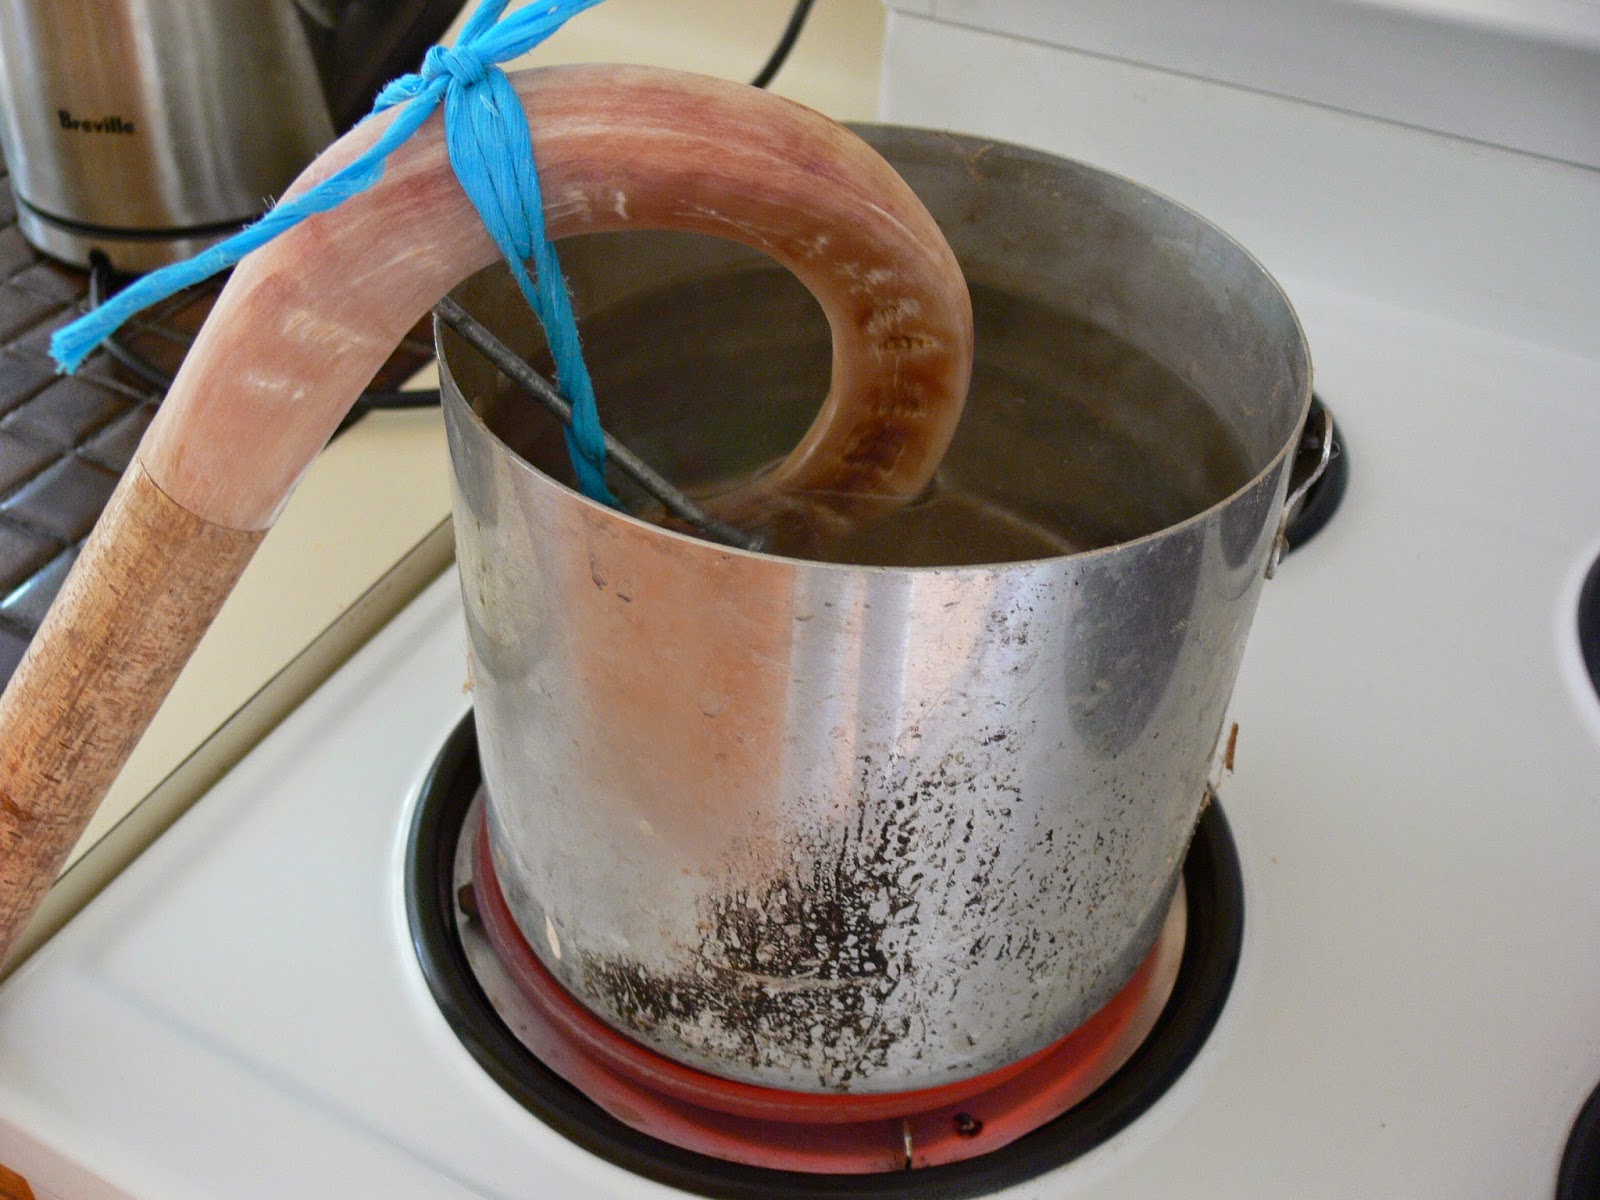
breed.  If you find a ram’s horn with plenty of curl, see my blog (www.woolshed1.blogspot.com) to see how to make a crook.

 Woods used
It’s better to use a burr of chestnut, elm or walnut, where the twisted grain provides strength, as straight-grained wood will split along the grain if dropped on a hard surface.

Hazel makes the best shanks as it’s fibrous and strong, and bends long before it breaks.  It’s also light weight, which is ideal on a long hike.

A good shepherd’s crook supports you going up hills and down gullies, and helps you negotiate crags and bogs, as well as acting as a third leg to take weight off tired legs and back when you stop.   Here you stand with both hands on the crook resting on your sternum, leaning forward with the stick end about two feet in front of you.

Dog trial stick
Note: A stick for dog trials in New Zealand has to have a maximum length of 1 metre.

Handle gap
The crook handle must also fit over your wrist, as you never lay your stick down; it’s your constant companion.  Fit a bit of pipe on the end as a ferrule to stop wear and splitting, letting some wood protrude to grip on smooth surfaces.  
 Materials and method

1. Band saw to rough shape and grind corners off. Chestnut burr.

2. Bore a hole in the head (50mm deep) to take the shank spigot.  Then bore a hole for a nail to go in the spigot to add strength to the joint.


3. Make a tourniquet to keep pressure on the joint when gluing

4. Protects the bark around joint with tape when rasping. 
Use edge of broken glass to smooth wood before sanding.


5. Use sealer, varnish, wax polish, and plenty of use will give a good hard finish.


February 5, 2015

Shepherd's Crook. How to make a horn-headed crook

Making a horn headed shepherd's crook

By Dr Clive Dalton

The bigger and more solid the horn, the more material you have to work with and hence the better the end result.  See the Border Shepherd's Stick Dressing Association website .  British sheep breeds with heavy horns like the Scottish Blackface or Swaledale are ideal, with other breeds like the Merino in Australia and New Zealand are lighter and not so good.  Some Wiltshire horn rams have good horns and so did the Drysdale in New Zealand before it's coarse wool went out of fashion.

 Plain horn head
Here are some basic instructions to make a 'plain horn' stick which would be used for generally walking around the farm, or taking with you to the sale - sometimes called a 'sale stick'.


The horn as cut from the ram’s head. Note the bone core which is part of the skull and which falls out on boiling.  You can't use that bit


Only use the solid end of the horn which comes from an old ram, best over two years old and has a second curl in the horn.  A single curl will be all core bone.

Decide which is going to be the neck of the horn handle. Start rounding it into shape.

Keep removing horn to develop the round shape.
 Boil the horn for about 4-5 minutes, then hold in the vice to bend the end twist out. Hold in position until it cools and is stable.


Hold the horn firmly in the vice to bore the hole for the shank spigot. Make sure the brace is perpendicular.

A hole of 60mm deep is ideal.

 Cut the spigot on the shank to fit the hole.

Bore a hole to insert a nail right down the length of the spigot and into the shank. This is to strengthen the joint with the horn.
2Cut the nail off and smear with plenty of a good two-pot glue.

 Check the join between horn and shank has no gaps.

Use cramps to keep pressure on the join till the glue dries. Let the glue dry for at least 24 hours. Check the joint is good and the glue is hard.


Use tape to protect the bark before trimming more off the horn with rasps or glass.
Protect the bark when holding it in the vice.
 
Thin the horn to weaken the corner so it bends easily after boiling for 4-5 minutes.  Keep shaping the head to remove excess horn.  Horn is easier to cut when it's warm.


 Put a tourniquet on the horn to prevent it opening up when bending it in to get a nice shape.  It should fit over a wrist when finished.  
Boil the very end only to soften it and bend it in the vice so it's in line with the shank.Pull it in by twisting the torniquet.  Let it cool right down before removing.  If it is not in line with the shank, twist it in the vice till cold

 Use a full range of sandpaper grits to finish the head.  If you find rasp marks at this stage, remove them with a bit of glass and re-sandpaper.
Shape the end of the head to put a name or decoration on it.
Put a tourniquet on the end again to stop it going back to it's natural bend, and let it cool before removing the tourniquet.  It must be in line with the shank.


Hang the stick up by the end to varnish.  Fit a ferule on the end to stop it wearing when used on hard ground.  A bit of copper water pipe is ideal but make sure some wool protrudes below the ferrule to get a grip on hard ground.


Further reading
See the website for the Border Shepherds Stick Dressing Association
http://www.bsda.eu/